Sunday, December 4, 2011

Stamped Salt Dough Ornaments


Here is a variation on the salt-dough ornament tutorial I did for Katy Elliott last year (for full instructions on making and cooking the dough, refer to that). I stamped these with ink after I rolled them out and before I baked them, using stamps and regular old stamp ink.

A few tips:
  • The recipe is simple - one part salt + one part water + two parts flour - but I find keeping the parts between 1/4 and 1/2 cup makes the most workable amount of dough. I make extra batches as I need them.
  • Nothing beats using a Kitchen-Aid for a getting perfectly smooth, chalk-white dough. It also eliminates the need to knead the dough at all.
  • A stamp pad with dry ink won't bleed. Using a light hand when inking also helps.
  • Stamp the designs before you use a biscuit cutter/glass/shape cutter to cut out the ornaments. 
  • If you roll the dough out directly on a Silpat, do your stamping and cutting and remove the excess, you will get perfect edges every time. It's trickier if you make them then try to move them toa  cookie sheet.
  • A smaller scaled ornament works best. The biggest of these is about 2.5". Any bigger, and it gets harder to dry them out.
Here are some made with Little Yellow Owl Workshop stamps (the snowflake is from another company):

I also made some using my favorite tree stamps. The stamps are wide and rectangular, but I cut circles out of the stamped dough. I love how these turned out:


They are slightly embossed:


Finish with a bit of embroidery floss and voila: ornaments. They would also make excellent gift tags - just use a fine-tipped permanent ink pen. They are so easy to make that you could whip up a batch or two over the weekend for last minute gifts.
 
Source: EvenCleveland  via Sandra Alexander on Pinterest

Thursday, December 1, 2011

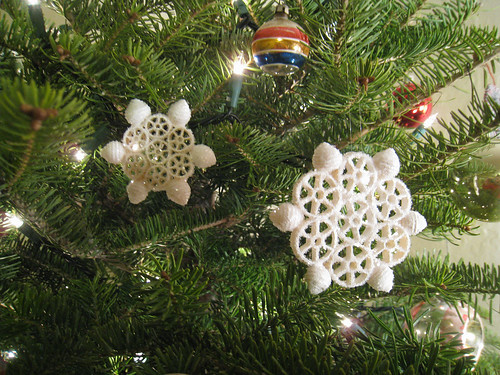
Macaroni Stars

3132226666 3c066f1479 Budget Gifts Ideas Winner!
A sweet and cost-effective gift for the holidays.


This is how you make them:
IMG 1985 748153 Budget Gifts Ideas Winner!
1. Select your macaroni – I used large and small wagon wheels, small shells, and fiori (flower shaped pasta).
2. Come up with your designs – this part is the most fun. I like to spill a few macaronis out and move them around, until I find the most snowflake-like arrangements. This year, I came up with ten different styles – the possibilities are only limited by your imagination (and the strength of your glue!)
3. Using a good strong craft glue (Like Aleen’s or Smart) and a small paint brush, apply glue generously to the edges of the pasta and attach the pieces to make your design. Once they are put together, I like to lay them out on wax paper to dry. Let glue dry completely, making sure to rotate your snowflakes periodically. This prevents them from sticking fast to your wax paper.

IMG 1987 748158 Budget Gifts Ideas Winner!
4. Using a large cardboard box, lay out a single layer of the snowflakes. Make sure that they are not touching each other. Spray lightly with glossy, fast-drying white spray-paint. Let dry. Re-apply in light layers, letting snowflakes dry in between, until they are completely coated. I spray the backs as well. As they are drying, give the box a few gentle shakes to keep them from drying to the bottom of the box. Make sure to keep the coats of paint light, or the macaroni will soften and start to lose it’s shape.
IMG 2051 719448 Budget Gifts Ideas Winner!
5. Once they are painted and dried, it’s time to apply the glitter. I thin my craft glue with a few drops of water, then use a sponge brush to lightly coat each snowflake with glue. Sprinkle generously with glitter, and let dry completely, Re-apply glitter as needed to cover any empty spots. I used large flake clear crystal glitter on these, but any glitter would look lovely – it’s craft magic.
IMG 2094 719455 Budget Gifts Ideas Winner!
7. Attach a looped length of ribbon or monofilament, and ta da! Macaroni snowflake ornaments!
I made mine white, but I think colorful ones might be fun, too. They make great garlands as well. I also tie them on the necks of wine bottles as little presents.
 
 
Sources: